Manage Scratch Environment ver 1.2
- Aliaksei Luhavy
- Maryia Lazavik
- Igor Godlevskyi (Deactivated)
1.INTRODUCTION
Each development team has access to a “developer scratch environment” to ensure that their changes are ready to be finalised.
Rancher is a Kubernetes management tool. Useful links:
- FOLIO rancher main URL: https://rancher.dev.folio.org
- Project UI URL:
https://<Project name>.ci.folio.org - Basic Okapi URL:
https://<Project name>-okapi.ci.folio.org - PgAdmin4 URL:
https://<Project name>-pgadmin.ci.folio.org(login as user ‘chart@example.local’ or ‘user@folio.org’ password ‘SuperSecret’) - Logs: https://logs.ci.folio.org/
Before commencing become familiar with this FAQ. Some teams also provide further general instructions.
For general assistance use the Slack channel #scratch-environments and help via your team-specific channel.
The Kitfox DevOps team wiki page has further resources regarding Rancher scratch environments.
Logging in
To have access to Rancher, you need to be a member of a FOLIO organization Team in GitHub. Go to the main Rancher URL and login with GitHub account.
Select the default Cluster and your Project. Default cluster name is folio-eks-2-us-west-2.
Project description
Every project has its own PostgreSQL, Okapi, pre-installed core backend modules, and Stripes Platform bundle. All of these containers run in the default namespace (which is named the same as the Project name). Also every Project runs Prometheus and Kafka. FOLIO modules are installed from the FOLIO Helm repository. Postgres and Kafka are installed from the Bitnami Helm repository.
Running modules
All Projects installed FOLIO Helm repository (Catalog in Rancher) which contains all backend modules, UI, pgadmin. By default the backend modules are pulled from DockerHub/folioci repository with a ‘latest’ tag. UI module is pulled from docker.dev.folio.org repository with own project latest tag <project>-latest. All modules can be managed in the App menu in Rancher, where new modules can be added or existing ones can be upgraded.
2. CREATE NEW SCRATCH ENV FOR TEAM
link: Manage Scratch Environment ver 1.2
General properties
Listed properties cannot be modified without full recreation of related resource.
Postgre DB versionManage Scratch Environment ver 1.2
DB Size
Build with parameter
Available parameters:
teamName, Action, TenantName, Repo, Plan, Change, Register, branch, platform_image

Parameter teamName:
Specifies the name of environment and access parameters in Rancher. For most values admin and members of github teamName team have access to Rancher to configure module deployment.
| Environment name | Status | Rancher permissions | Purpose | Update type (Automated/Manual) Operational time (h/d) | Platform-core branch | Env. re-creation ticket | Development team status (optional) | Feedback | Log4j vulnerability fixing |
|---|---|---|---|---|---|---|---|---|---|
| metadata | CHECKEDAvailable to use. | Spitfire | platform-complete/master | RANCHER-31 - Getting issue details... STATUS | KEEP IT | Done RANCHER-101 - Getting issue details... STATUS | |||
bulk-edit (old concorde) | CHECKED Available to use. | Firebird | RANCHER-70 - Getting issue details... STATUS | KEEP IT | Done RANCHER-150 - Getting issue details... STATUS | ||||
| core-functional | IN REVIEW | prokopovych/core-functional | platform-complete/prokopovych-rancher | RANCHER-54 - Getting issue details... STATUS | KEEP IT or SHUT DOWN | Done RANCHER-141 - Getting issue details... STATUS | |||
| volaris | CHECKEDAvailable to use. | Volaris | RANCHER-75 - Getting issue details... STATUS | KEEP IT | Done RANCHER-127 - Getting issue details... STATUS | ||||
| volaris-2nd | IN REVIEWAvailable to use. | Volaris | platform-core/volaris-rancher | RANCHER-78 - Getting issue details... STATUS | KEEP IT | Done RANCHER-127 - Getting issue details... STATUS | |||
| core-platform | CHECKEDAvailable to use. | Core Platform | platform-complete/core-platform-rancher | RANCHER-53 - Getting issue details... STATUS | SHUT DOWN | RANCHER-188 - Getting issue details... STATUS | |||
| falcon | CHECKEDAvailable to use. | Falcon | platform-core/falcon-rancher | RANCHER-56 - Getting issue details... STATUS | KEEP IT | Done RANCHER-120 - Getting issue details... STATUS | |||
| firebird | CHECKED Available to use. | Firebird | platform-core/firebird-rancher Latest release based on snapshot | RANCHER-49 - Getting issue details... STATUS | KEEP IT | ||||
| folijet | CHECKED Available to use. | Folijet | RANCHER-47 - Getting issue details... STATUS | KEEP IT | Done | ||||
| vega | CHECKED Available to use. | Vega | RANCHER-55 - Getting issue details... STATUS | KEEP IT | Done RANCHER-157 - Getting issue details... STATUS | ||||
| spanish | CHECKED Available to use. | Spanish | platform-complete/master | FOLIO-3320 - Getting issue details... STATUS | KEEP IT or SHUT DOWN | Done RANCHER-153 - Getting issue details... STATUS | |||
| spitfire | CHECKEDAvailable to use. | Spitfire | platform-core/spitfire-rancher platform-core/snapshot-spitfire | RANCHER-48 - Getting issue details... STATUS Please refer RANCHER-125 to re-provision env | KEEP IT | Done RANCHER-125 - Getting issue details... STATUS | |||
| thor | CHECKEDAvailable to use. | KEEP IT | Done | ||||||
| thunderjet | CHECKEDAvailable to use. | thunderjet | platform-core/thunderjet-rancher | RANCHER-52 - Getting issue details... STATUS | KEEP IT | Done RANCHER-134 - Getting issue details... STATUS | |||
| unam | Used for testing config. | KEEP IT or SHUT DOWN |
Parameter Action:
Specifies what action will be performed.
| Value | Description |
|---|---|
| create | Create environment with specified parameters. |
| update | Update enviroment with new list of modules. |
| delete | Delete enviroment. DB data will be erased. |
Parameter TenantName:
Default value: diku
This parameter specifies tenantID for enviroment. Okapi will contain 2 tenants supertenant and TenantName. All modules will be registered and deployed within tenant TenantName.
!!! NOTE !!! Module platform-complete is configured to address a specific tenant, which is determined during BUILD-UI.
Parameter Repo and branch:
Files okapi-install.json & stripes-install.json are used to create/update environment. They can be specified with repo and branch.
Repo value stands for platform-core or platform-complete.
There is separated list of branches for each value of repo.
!!! NOTE !!! If selected branch does not contain okapi-install.json & stripes-install.json, pipeline will fail.
There are created branches in platform-core (e.g. folijet-rancher). These branches contain a list of modules required for a particular team.
Parameter platform_image:
Specified image will be used for module platform-complete. Available values are formed by BUILD-UI.
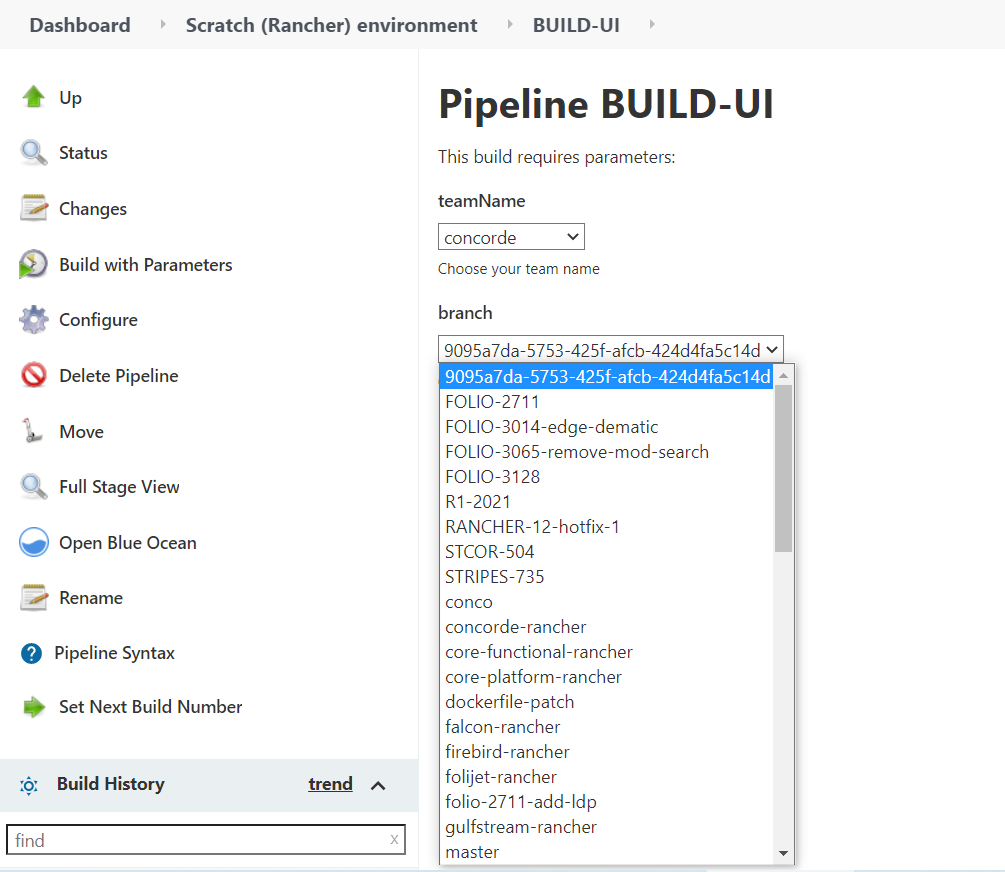
3. Build UI module from branch
To build UI from a specific branch, use this Jenkins pipeline:
https://jenkins-aws.indexdata.com/job/scratch_environment/job/BUILD-UI/
- Ensure that you are logged in to Jenkins
- Select “Build with Parameters”
- Choose your team name
- Choose the branch that you want to build from
- Then select “Build”
The tag for the image is: docker.dev.folio.org/platform-complete:team_name-build number
for example : docker.dev.folio.org/platform-complete:core-platform-530
How to use UI
- go to rancher →choose your environment → apps → platform-complete

2. upgrate module need find "answers" option → change image
Here is default answers for Frontend Bundle Application deployment:
    resources.limits.cpu = 200m
    resources.limits.memory = 500Mi
    image.tag = <project_name>-latest
    ingress.enabled = true
    ingress.hosts[0].host = <project_name>.ci.folio.org
    ingress.hosts[0].paths[0] = /
In package.json set --max-old-space-size=8192 to build options.

4. Build backend module from branch
Building Backend modules
You can build your own module, and automatically deploy it with Rancher pipeline and Helm. To get started, create your own branch and modify .rancher-pipeline.yml to your needs (for example as in this pipeline).
Go to Workloads -> Pipelines, run pipeline for that branch, and then Rancher will deploy the new version of that module.
Any backend module can be built from a specific branch. Use this Jenkins pipeline:
https://jenkins-aws.indexdata.com/job/scratch_environment/job/BUILD-BACKEND/
- Ensure that you are logged in to Jenkins
- Select “Build with Parameters”
- Choose the module that you want to build
- Choose which branch that you want to build the module from
- Then select “Build”
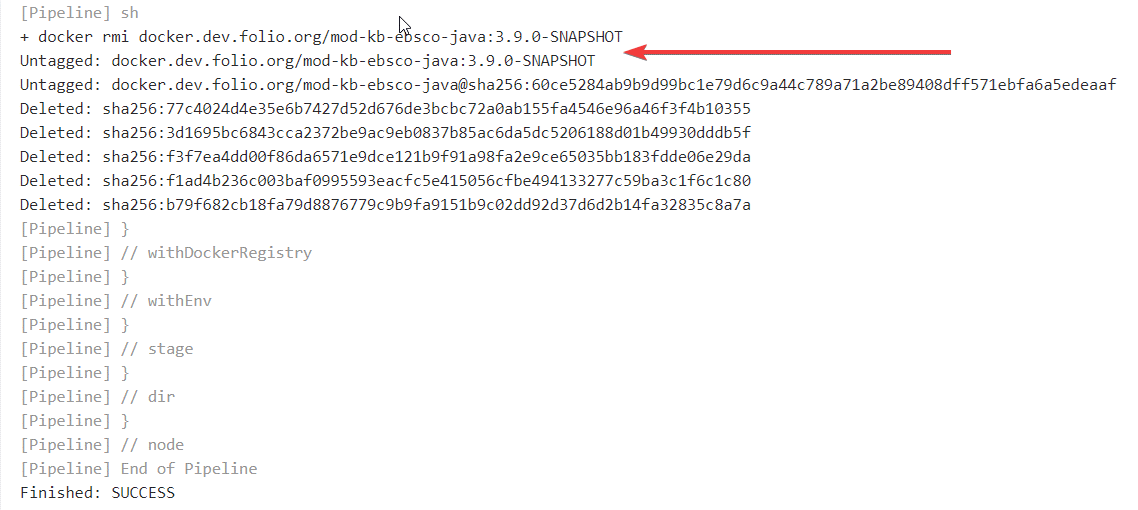
- Select “Console Output”
- Near the end, find the full image name with the proper tag:
- Go to your environment in Rancher –> Apps –> the module that you built
- Select the vertical ellipsis ⋮ and then “Upgrade”
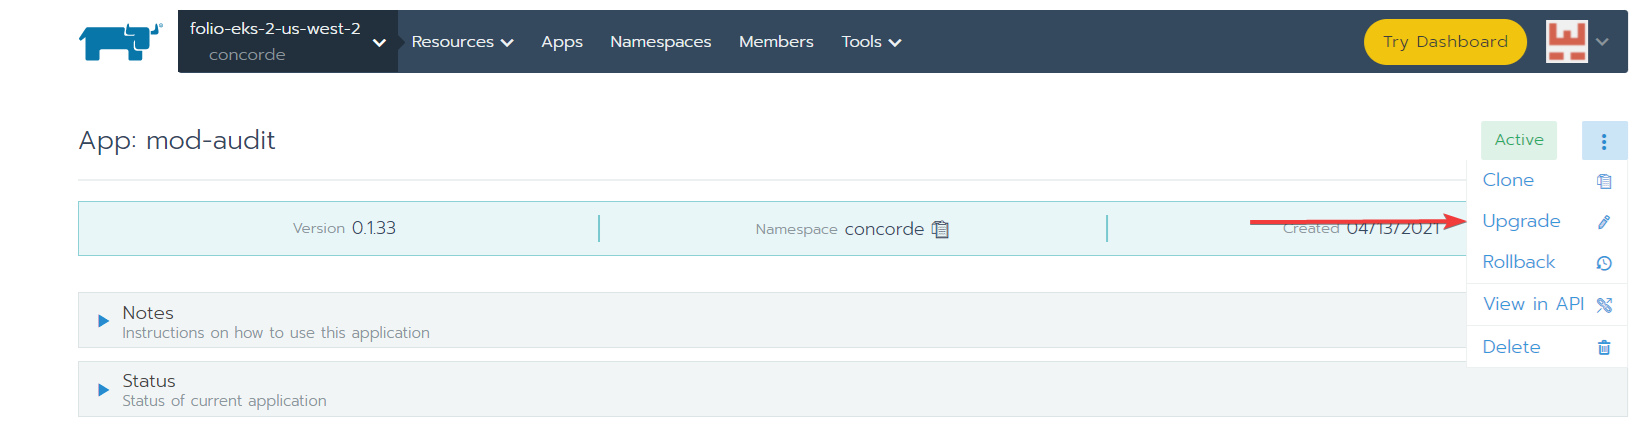
- In the “Answers” section, add the following:
- Variable:
image.repository - Variable:
image.tag- Value: the tag obtained from the build
- Variable:

- Select “Upgrade”
Building Frontend
Modify sample pipeline and start build.
Here is default answers for Frontend Bundle Application deployment:
    resources.limits.cpu = 200m
    resources.limits.memory = 500Mi
    image.tag = <project_name>-latest
    ingress.enabled = true
    ingress.hosts[0].host = <project_name>.ci.folio.org
    ingress.hosts[0].paths[0] = /
In package.json set --max-old-space-size=8192 to build options.
5.Registering modules in Okapi
Module registration runs automatically after the install or upgrade procedure. Helm uses post-install and post-upgrade hooks to run the module registration job for each module. Helm gets ModuleDescriptors from the FOLIO Registry (https://folio-registry.dev.folio.org) – it gets the latest snapshot descriptor.
Default steps for module registration:
- Pushing module descriptor
- Pushing module deployment
- Creating tenant (default ‘diku’)
- Enabling module for tenant
Docker commands can also be used to do registration manually:
- Registering a particular module (backend or UI module)
docker run --rm -e TENANT_ID=diku -e OKAPI_URL=https://<project name>-okapi.ci.folio.org -e MODULE_NAME=<module name> docker.dev.folio.org/folio-okapi-registration - Registering all modules (backend and UI from ‘platform-complete’ list)
docker run --rm -e TENANT_ID=diku -e OKAPI_URL=https://<project name>-okapi.ci.folio.org -e MODULE_NAME='' docker.dev.folio.org/folio-okapi-registration - Registering all UI modules only
docker run --rm -e TENANT_ID=diku -e OKAPI_URL=https://<project name>-okapi.ci.folio.org -e MODULE_NAME='platform-complete' docker.dev.folio.org/folio-okapi-registration

for example:
docker run --rm -e TENANT_ID=diku -e OKAPI_URL=https://core-platform-okapi.ci.folio.org -e MODULE_VERSION=24.0.0-SNAPSHOT.999 -e MODULE_NAME=mod-inventory-storage docker.dev.folio.org/folio-okapi-registration
Apply module permissions
The last step after modules registration is to apply permissions for modules to the admin user.
- Applying permissions for all installed modules to
diku_admindocker run --rm -e TENANT_ID=diku -e ADMIN_USER=diku_admin -e ADMIN_PASSWORD=admin -e OKAPI_URL=https://<project name>-okapi.ci.folio.org folioci/bootstrap-superuser
Environment variables
Environment variables for database and backend modules are stored in Kubernetes secrets (Workload -> Secrets) and installed by default to every Project.
Deployment tips
Some backend modules are based on SpringBoot and require more CPU to start. To deploy those applications (such as mod-agreements or mod-licenses) you need to override CPU and memory parameters. Add ‘answers’ to module deployment:
  resources.limits.cpu = 500m
  resources.limits.memory = 600Mi
If you notice a pod restarting a lot, it may be that it is running out of memory. Usually increasing the resources.limits.memory in its yaml via Rancher will fix this. The pod limits on CPU may also be too low to allow your cluster to run reliably. If things go wrong, consider increasing resources.limits.cpu for a given pod. You may also consider removing the pod-level resources.limits.cpu limit and set a limit for your namespace instead, so as to not deplete other teams’ resources on the cluster.
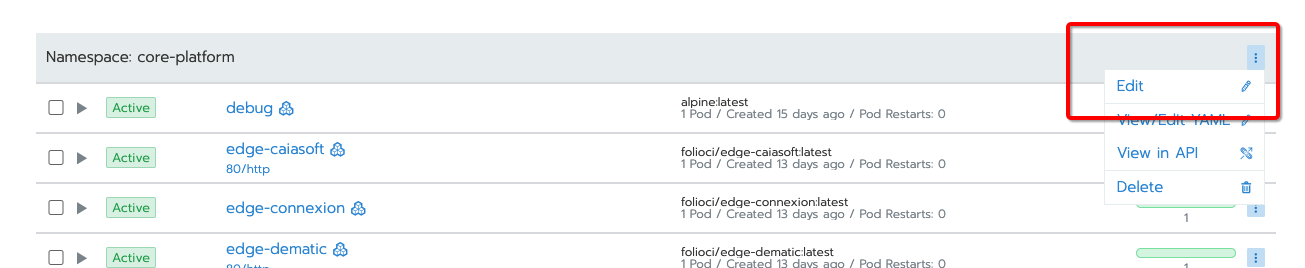
You can set a namespace limit in the Edit menu item in the Rancher UI:
S3 Storage
Each development team has been provided with a dedicated S3 bucket that can be used for additional storage. The name of each team’s S3 bucket is the name of the team prepended with ‘folio-‘. For example, ‘folio-folijet’. Each bucket is read/write from any K8s pod running in the dev environment. Additional credentials are not required. Each bucket is also public read-only. To share and access an object in the S3 environment outside of the dev-environment, the object must be explicitly included in the URL. For example, to download the README.md file in the folijet team bucket, the following URL would be used:
http://folio-folijet.s3.amazonaws.com/README.md
6.Create Elasticsearch index snapshot
To create Elasticsearch index snapshot for Rancher performance testing cluster, go to your Rancher environment, choose your performance testing cluster (perf-ekes-team_name):
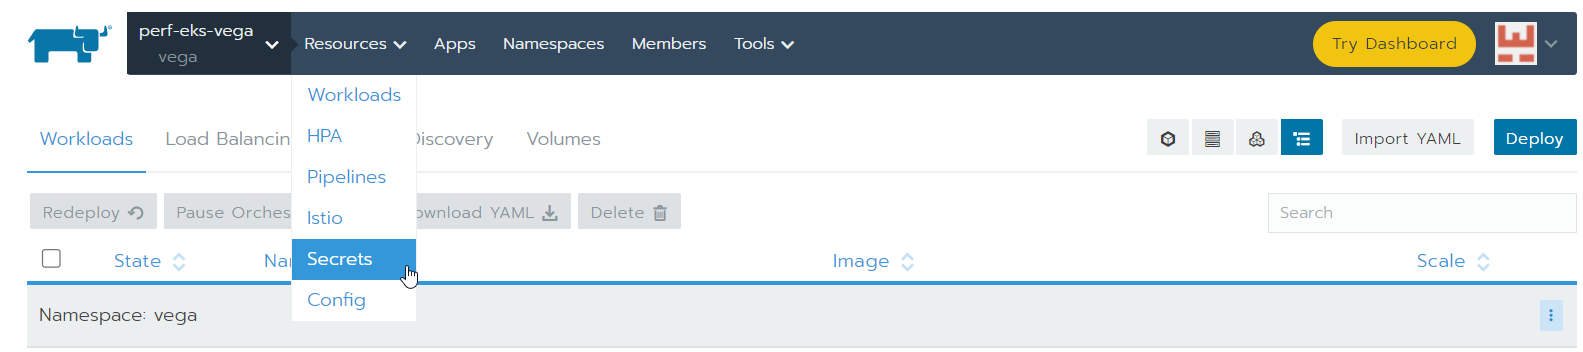
- Find your Elasticsearch hostname, username, and password. In Rancher test environment, select your project name ( Team name ) ->Secrets.
- Scroll down and find
Namespace:team_nameand select the vertical ellipsis fordb-connect-modules, and then chooseEdit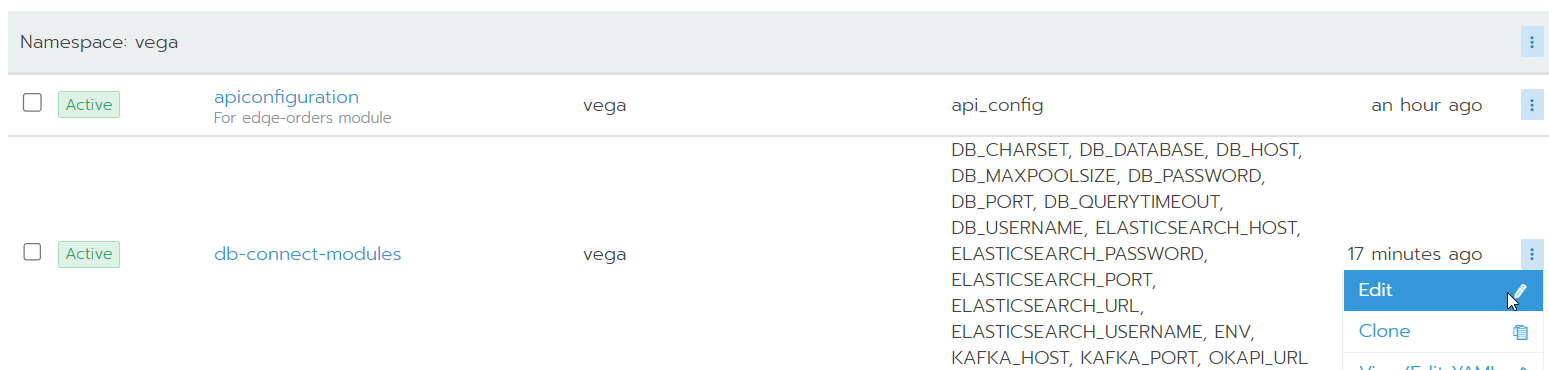
- Copy the value of
ELASTICSEARCH_HOST,ELASTICSEARCH_USERNAME, andELASTICSEARCH_PASSWORD.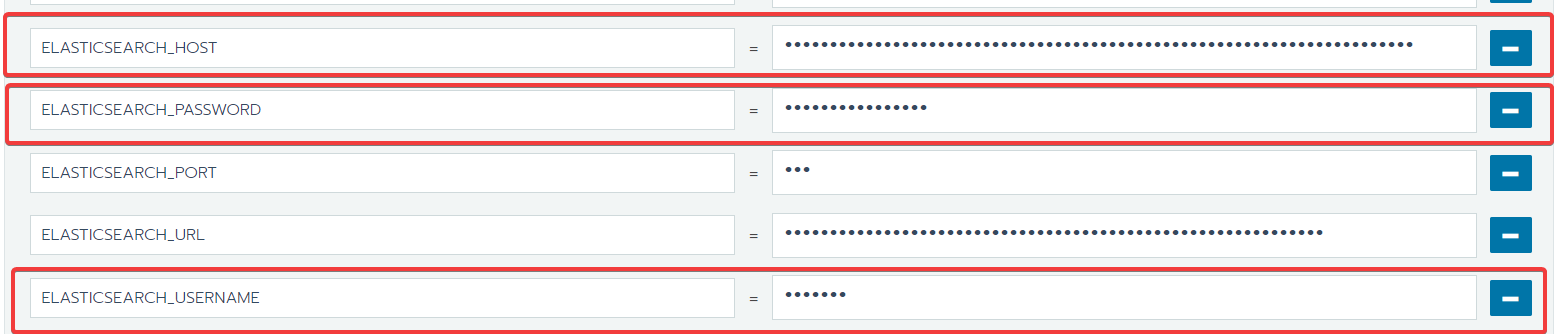
- Ask the Kitfox DevOps administrator to create the repository for you. (The repository is attached to persistent AWS S3 bucket.)
- Go to project name ( Team name ) -> Resources -> Workloads -> ubuntu, select the vertical ellipsis, and choose:
Execute Shell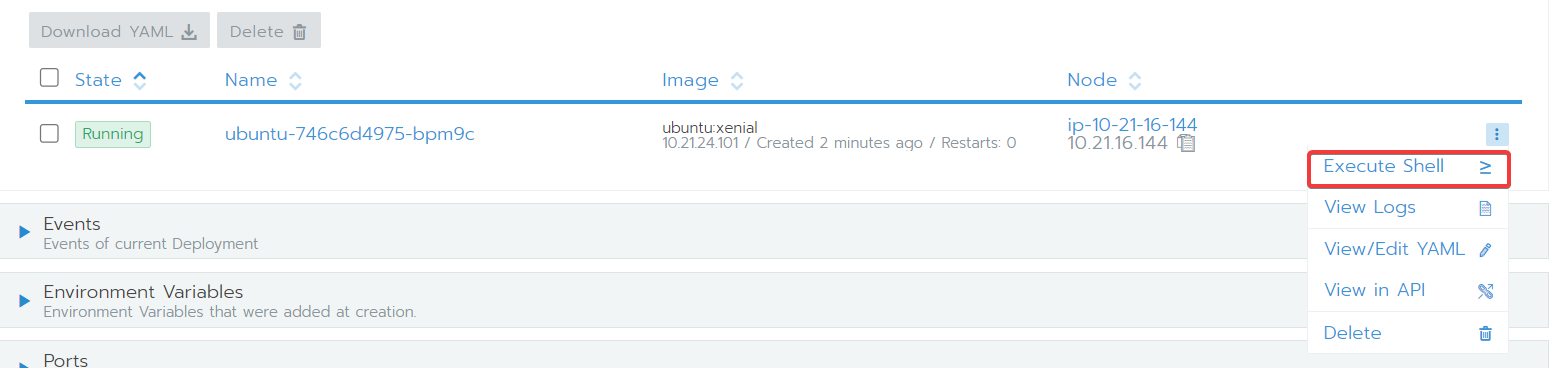
Create a snapshot
curl -XPUT 'ELASTICSEARCH_HOST/_snapshot/repository-name/snapshot-name -u ELASTICSEARCH_USERNAME:ELASTICSEARCH_PASSWORD
Restore a snapshot
curl -XPOST 'ELASTICSEARCH_HOST/_snapshot/repository-name/snapshot-name/_restore' -u ELASTICSEARCH_USERNAME:ELASTICSEARCH_PASSWORD
Restore a specific index
curl -XPOST 'ELASTICSEARCH_HOST/_snapshot/repository-name/snapshot-name/_restore' -d '{"indices": "my-index"}' -H 'Content-Type: application/json' -u ELASTICSEARCH_USERNAME:ELASTICSEARCH_PASSWORD
7.HOW TO ADD NEW MODULE FOR RANCHER
- go to rancher → apps → launch
- search needs module
- choose namespase for modules ( by default name of module) , should be choose your team name
- add parameters for using module
- launch


8.HOW CONNECTION TO DATABASE
- go to rancher → apps → pgadmin4 http://bulk-edit-perf-pgadmin.ci.folio.org/
- (login as user ‘chart@example.local’ or ‘user@folio.org’ password ‘SuperSecret’)
- all parameters locate to resources → secrets → db-connect-modules

4. go to pgadmin4


9.HOW TO CREATE DUMP DATABASE USING RANCHER ( backup)
- need connection to database "pg-folio"
- apps → pgadmin4

3. using shell , pg_dump command
/usr/local/pgsql-12/pg_dump --file "/var/lib/pgadmin/storage/user_folio.org/<<name file backup>>" --host "pg-folio" --port "5432" --username "postgres" --verbose --format=c --blobs --section=pre-data --section=data --section=post-data "folio_modules"
password: (don't forget enter to password ( db_password)) --→ how to find db_password ( resourses → secrets → db_connetcion_modules → DB_PASSWORD )

4. after dump was created, should be create a copy to your local machine ( usecase: copy to env which to use for restore dump)
how to cp from pgadmin backup postgres into local mashine:
from
rancher kubectl -n thor cp pgadmin4-<<number pod with backup>>:/var/lib/pgadmin/storage/user_folio.org/<< name file backup>> /<< your home directory/file backup>>
to
rancher kubectl -n unam cp /<< your home directory/file backup>> pgadmin4-<<number pod where need restore>>:/var/lib/pgadmin/storage/user_folio.org/<<name file backup>>
how to using rancher CLI to local machine
1. install tar.gz rancher cli https://github.com/rancher/cli/releases
2. tar -xvf tar
3. needs add racnher execute file in /bin/
4. rancher login https://rancher.dev.folio.org --token (how create token)
- go to rancher (under account foto click on api key )
- create api key your temporapy token
for example : rancher login https://rancher.dev.folio.org --token token-tlrgx:w4xt8q496pjlqfdtsd8hwdkkv7j8c97tp8tzj7ll8fwzx86bwdqm6n


5. rancher cluster
6. rancher cluster kubeconfig c-479xv (your using cluster id)
7. rancher cluster kubeconfig c-479xv > /home/.kube/config (add your path to .kube if you need use kubectl)
10.HOW TO CREATE RESTORE DUMP TO NEW ENV
if we have new env & empty database
- go to rancher → apps → pgadmin4 → shell
- execute next command to restore dump
/usr/local/pgsql-12/pg_restore --host=pg-folio --port=5432 --username=postgres --dbname=<<name database>> --section=pre-data --section=data --section=post-data -s --verbose /var/lib/pgadmin/storage/user_folio.org/<< name file backup>>
password:
3. go to ui pgadmin4 →check restore
---------------------------------------------------------------------------------------------------
if we have env with old database
1. go to UI pgadmin4 ( for example folio_modules bd)
2. should be download file backup to this pgadmin pod for restore
3. click on create a new database 

4. next point needs to scale working modules to state 0 "-", this options help delete parameters old database ( !!! not scale apps → elasticsearch, kafka, pgadmin4, postgres)


5. after was modules scaled , should be go to UI pgadmin4 → choose new database → using psl command line for sure that all old database will drop correct

have to execute 3 command ( for check that database haven't active datname those database which need drop)
SELECT * FROM pg_stat_activity WHERE datname = '<database_name>';
SELECT pg_terminate_backend (pid) FROM pg_stat_activity WHERE pg_stat_activity.datname = '<database_name>';
DROP DATABASE <database_name>;


5. after DROP database , not leaving commandline → execute CREATE DATABASE <name database>

6. go to pgadmin4 → execute shell → commanline → need to do a restore for database "folio_modules"
/usr/local/pgsql-12/pg_restore --host=pg-folio --port=5432 --username=postgres --dbname=<< name database>> --section=pre-data --section=data --section=post-data -s --verbose /var/lib/pgadmin/storage/user_folio.org/<<name file backup>>
7. check how to restore database
- modules must have owner ( name modules)

8. after success restore need scale all modules again to " + "

9. modules not active now → should be do manipulate for registration modules, check table " discovery modules", enable modules for okapi
using for help https://dev.folio.org/reference/api/