Back-end module development using the scratch environment and Rancher
- Bohdan Suprun (Deactivated)
- Kyle Felker
- Taras Spashchenko
The scratch environment (http://core-functional.ci.folio.org/) is a shared environment for deploying and testing back-end modules. Back-end devs can use it in place of the local Okapi setups described in this document: https://dev.folio.org/guides/run-local-folio/, which eliminates a lot of the work of setting up a local development environment. No fiddling with virtualboxes, local host networks, or the Okapi module registration process necessary.
What is Rancher?
From the Rancher site: Rancher is an open source software platform that enables organizations to run and manage Docker and Kubernetes in production. With Rancher, organizations no longer have to build a container services platform from scratch using a distinct set of open source technologies. Rancher supplies the entire software stack needed to manage containers in production.
To put it another way, Rancher is a tool for deploying Docker containers to the scratch environment quickly and relatively painlessly. You can overwrite the stock docker container for a given module with your own and be testing it on the scratch environment in minutes.
More comprehensive information on Rancher: https://dev.folio.org/faqs/how-to-get-started-with-rancher/
Pay attention to the https://dev.folio.org/faqs/how-to-get-started-with-rancher/#deployment-tips if your module needs more resources especially CPU, because only 50m (0,5% of CPU vcore) is dedicated by default.
Please do not forget to release resources (CPU and Memory) when you do not need it anymore for your module.
Requirements:
Docker will need to be installed on your system, and you will need to set up a public docker repo in docker hub. Working with back-end modules also requires Maven and a recent version of the Java SE.
How to do it:
Clone the module you need to work on from github using the --recursive flag.
git clone --recursive https://github.com/folio-org/mod-inventory-storage.git
Move into the top-level directory for the cloned module, and execute the maven build command:
mvn clean install
From the same location, build a docker image. Make sure you name it using the syntax of your remote docker repo. You should also use a tag, as this will make the deployment process easier.
docker build -t your_dockerhub_username/your_public_reponame:tag_name .
Push the docker image to your remote repo on Docker Hub.
docker push your_dockerhub_username/your_public_reponame:tag_name
Now point your browser at the Rancher login page for the scratch environment. You will need to login using your Github credentials.
URL: https://rancher.dev.folio.org/p/c-cv652:p-9mwdx/apps
Click on the "apps" option in the top navigation.
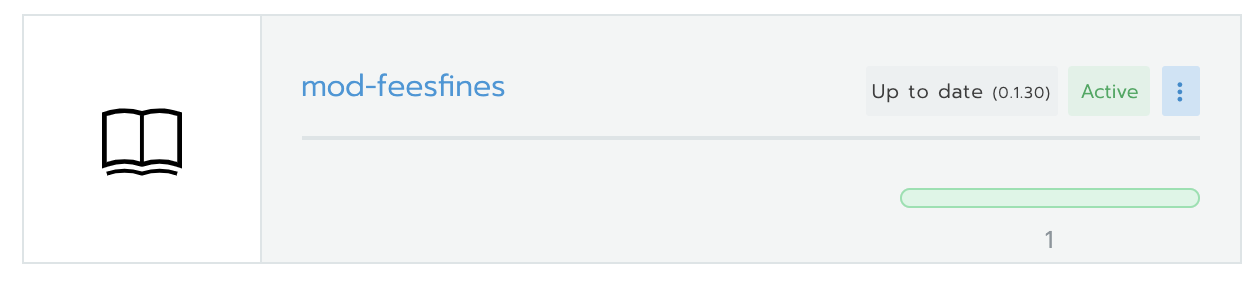
Scroll down and find the module you are working on. The entry should look something like this:
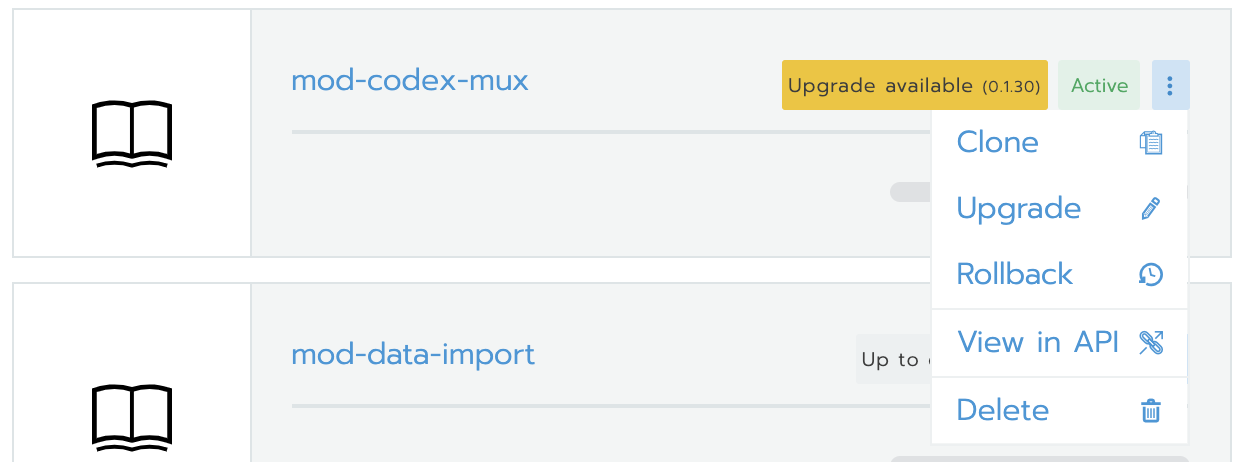
Click on the three vertical dots, and choose "upgrade" from the options menu:
Scroll down to the "Answers" section on the upgrade screen. click "add new answer." A new set of variable/value fields should appear:

Create a new variable named image.repository. This should match the name of the public repository you pushed your docker image to. Then add another answer and set the variable to image.tag. The value of that variable should be the tag you assigned to your image.

Now scroll down and click the "upgrade" button.
You'll be redirected to the apps screen. scroll down again and locate the module you're working on. If all goes well, the status should show that the module is being downloaded and installed, and it should eventually return to showing a green bar and one app running.
Congrats, you've deployed a new docker container to the scratch environment!
When you've made changes to the module and want to upload them, rebuild the project with maven, then rebuild the docker image with a new tag, push it up to your repo, then go to Rancher and edit the item.tag variable in the upgrade screen of your module to the new tag name and click the "upgrade" button. That will pull the new version of the image from your repo.
Important: When you are finished working on a module
...make sure that you go back to the upgrade screen for that module in Rancher and remove the new answer fields you added, then hit the upgrade button. This should clear your image from the scratch environment.
Troubleshooting
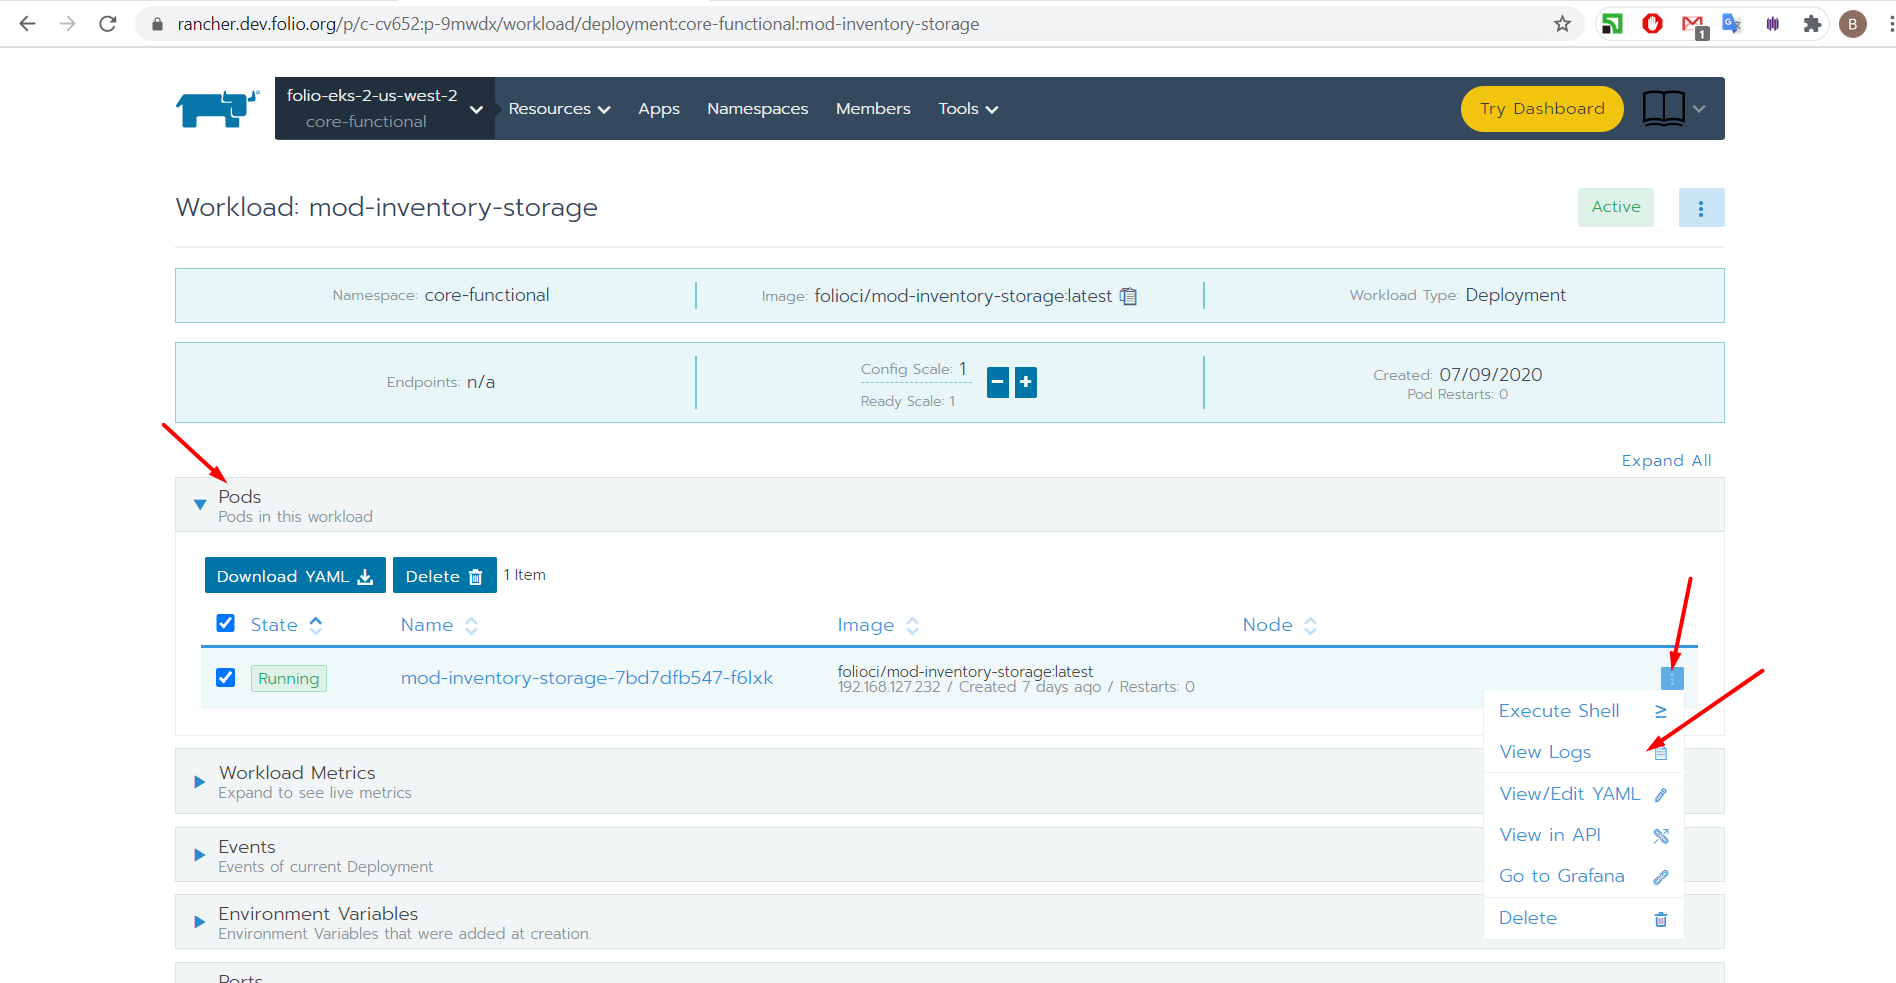
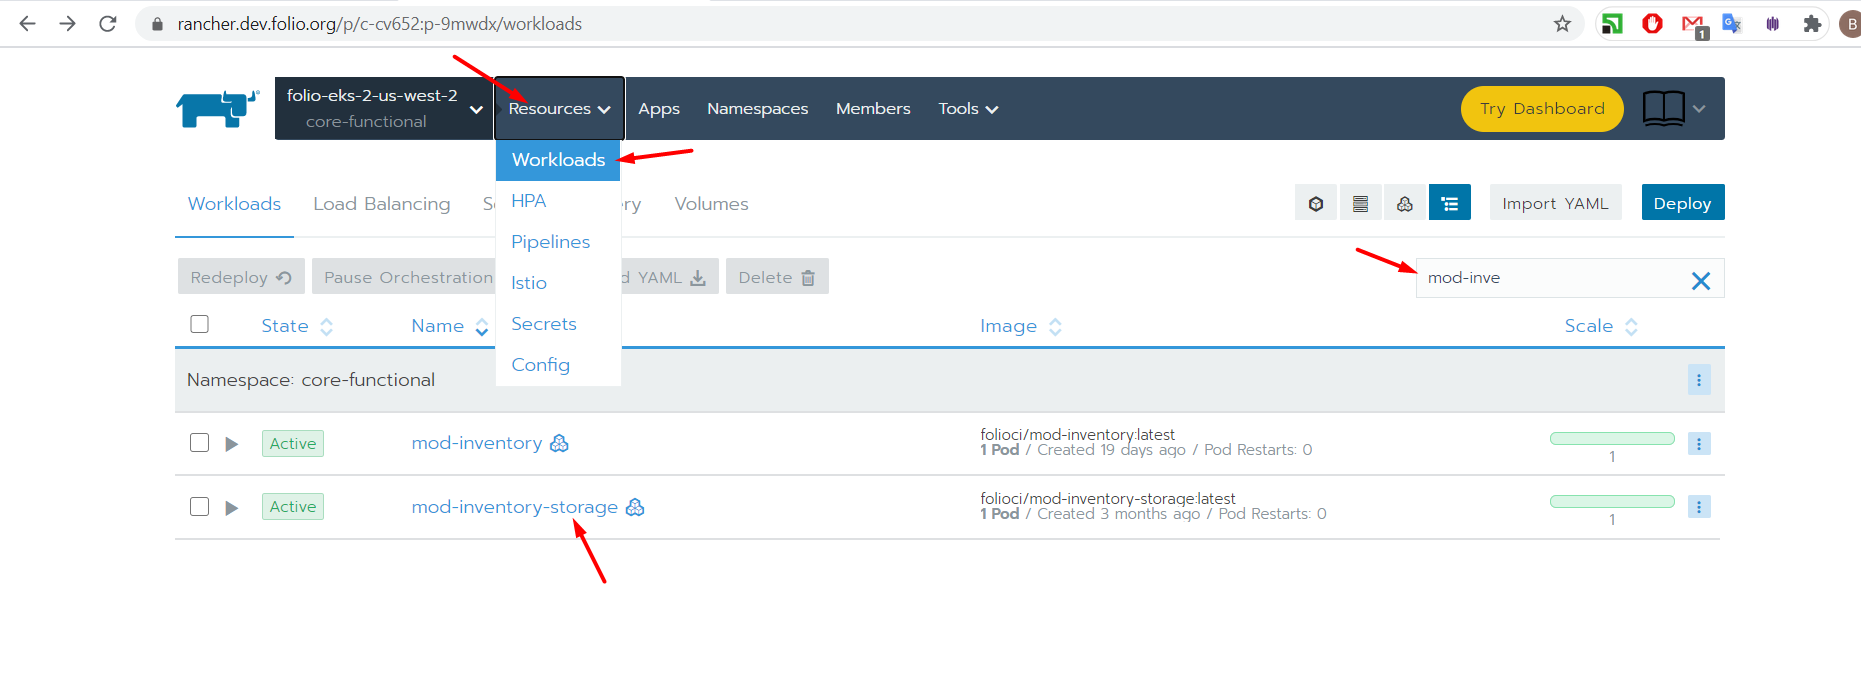
If something goes awry, you can access the logs by clicking on the "Resources" menu at the top of the page and selecting the "Workloads" option. Then scroll down to or search for the module you are interested in and click on it.
From there, you can find the logs by clicking on the three vertical dots and choosing "view logs"