Microsoft Access
Please see the LDP wiki for the latest version of this page.
Note: We've had trouble confirming this workflow for Access. We hope to troubleshoot soon.
Installing PostgreSQL drivers
First, you need to make sure your Windows machine has the right driver to connect to a PostgreSQL database. This is an ODBC driver that is tailored to PostgreSQL, and PostgreSQL shares ODBC drivers that can be installed a variety of ways.
- I recommend using the MSI (Microsoft Installer) version of the ODBC driver installer.
- On this page, scroll all the way down to find the latest versions of the driver.
- For each PostgreSQL version (e.g., 12.0.0), you'll see three files: a plain .zip file, then one that ends with x86 and another that ends with x64. The plain .zip contains a .exe file, but using this file doesn't seem to work well. I recommend using the x64 file if you have a 64-bit Windows machine and the x86 file if you have a 32-bit Windows machine.
- If you don't know if you have 32-bit or 64-bit Windows, go to your Windows settings and look for "About this PC". You should see something like "System type", which should say 32-bit or 64-bit. Most machines these days are 64-bit.
- Download the right .zip file, then extract the contents to get to the .msi file
- Run the .msi file to install the drivers
Setup for MS Access 2016
- Set up new ODBC data source in Windows:
- Navigate to Control Panel\All Control Panel Items\Administrative Tools
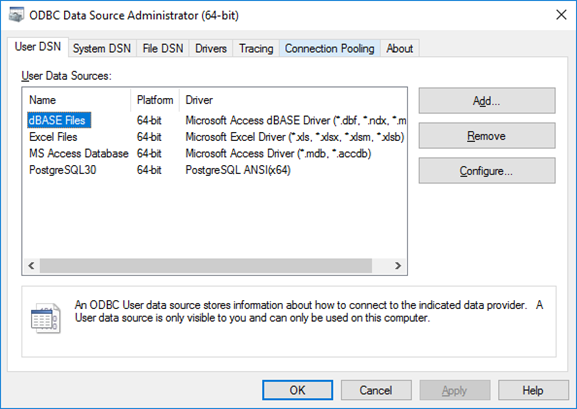
- Select the appropriate “ODBC Data Sources” link (32 or 64-bit)
- Click “Add”
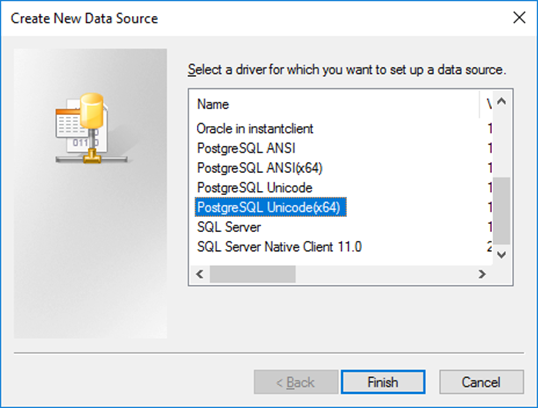
- Choose “PostgreSQL Unicode...”
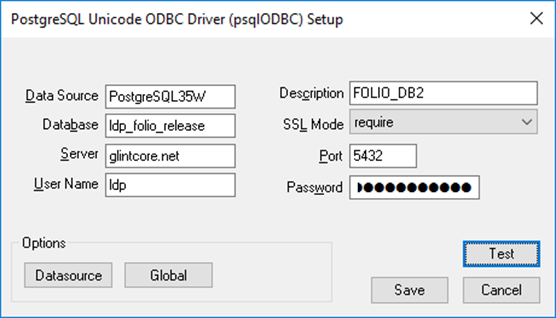
- Enter connection details and test connect. If connect is good, click “Save”
- Note: Ensure that SSL Mode is set to "require"
2. Open Access
- Create a new “Blank desktop database”
- Close the empty table that has been created by default.
- Click “External Data” in the top menu
- Click “ODBC Database”
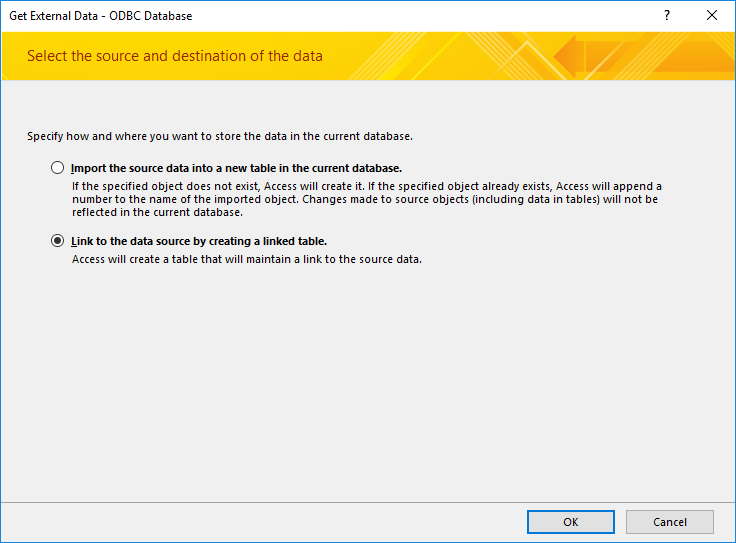
- Choose “Link to the data source by creating a linked table” and click “OK”
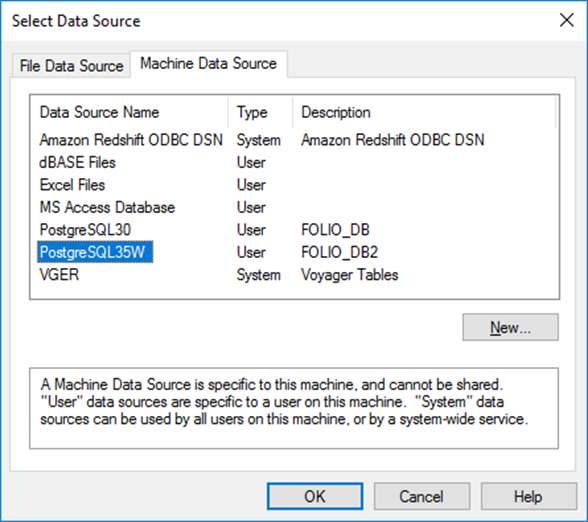
- In the “Select Data Source” window that opens, click the second tab found at the top of the window (“Machine Data Source”). This will give you access to the system-level ODBC connection you created earlier.
- Choose the appropriate connection.
- Click "OK"
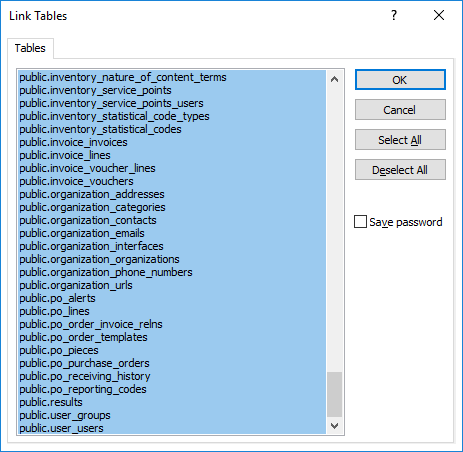
- In the next window that opens, select all "public" tables (i.e., tables with names that start with "public."), and click the “OK” button.
- The tables will start to import.
You should now be connected to the Data Warehouse and can create queries.
Setup for MS Access 2019
Creating an MS Access file and setting up the connection
Open Access
Create a new “Blank desktop database”
Close the empty table that has been created by default.
Click “External Data” in the top menu
Under "New Data Source," expand "From Other Sources," then click “ODBC Database”
Choose “Link to the data source by creating a linked table” and click “OK”
- In the “Select Data Source” window that opens, click the second tab found at the top of the window (“Machine Data Source”).
- Click "New..." to set up a new connection to the LDP public instance*
- Select "User Data Source"
- In the list of drivers that pops up, scroll down until you see the PostgreSQL drivers. Choose “PostgreSQL Unicode”. Click "Next >".
- Click "Finish."
- In the window that opens, enter the connection details from above, using the "host" information for the "Server" field. For Description, give the connection a name.
- Click "Test." If the connection is successful, click “Save.”
- In the next window that opens, click the “Select All” button on the right, click the “Save password” box so that it is checked, and click the “OK” button. (Note: if you choose to save the password, you may have to confirm this choice for every linked table.)
*Note: these instructions work for MS Access 2019. If they do not work for previous versions of MS Access, the MS Access 2016 instructions might work. In that version, you need to use the Windows ODBC administrator to set up the data connection outside of MS Access. I had trouble when I used the 64-bit version of the ODBC administrator to set up the data connection, so if you get an error with 64-bit, you might want to try the 32-bit version of the ODBC administrator.
Running Pre-fab LDP Queries (from GitHub Repository)
As with many integrated library systems (ILS) of the past, Microsoft Access can be used as your front-end SQL query-writing utility for FOLIO’s Library Data Platform (LDP). When building one’s own queries in Access, interactions with the LDP should conform to one’s previous experiences with other ILS.
However, when taking advantage of the GitHub repository for pre-fab LDP queries, a slightly different pass-through query procedure will be necessary. This guide will walk you through that process for a machine running Windows 10.
Through Select Your Query
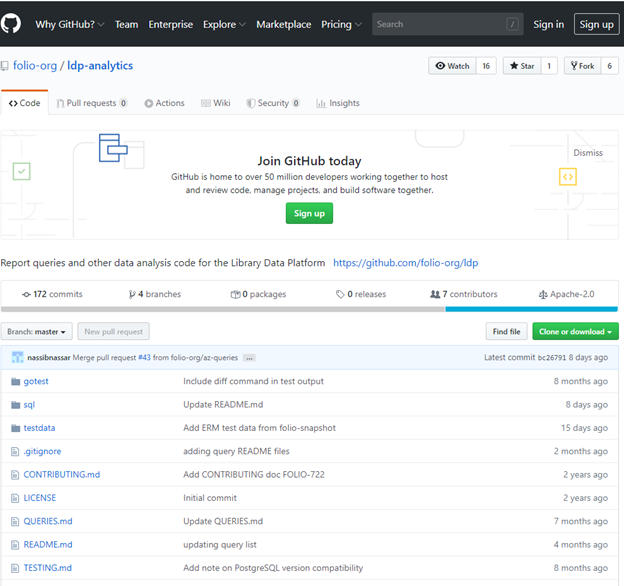
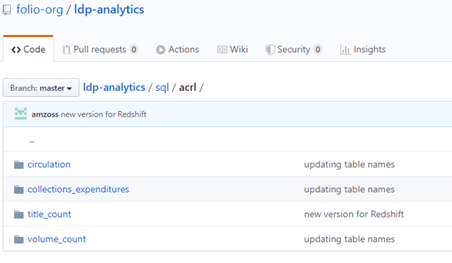
- Navigate to the LDP query repository on GitHub: https://github.com/folio-org/ldp-analytics
- Click on the “sql” folder link
Next Page
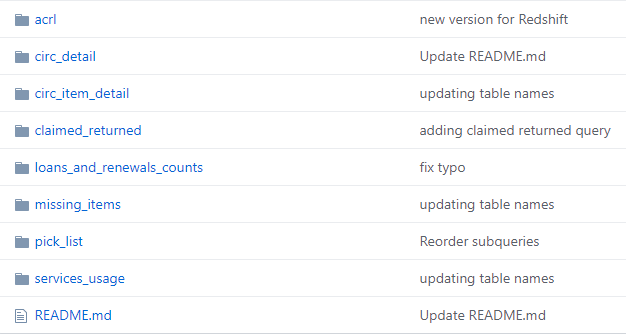
- Navigate to your desired query folder
- For example: To access the ACRL title count query, click on the “acrl” folder
Next Page:
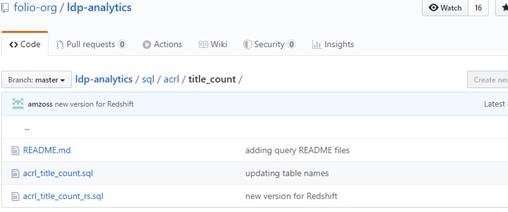
- Click on the “title_count” folder
Next Page:
- Click on the “acrl_title_count.sql” link
Next Page:
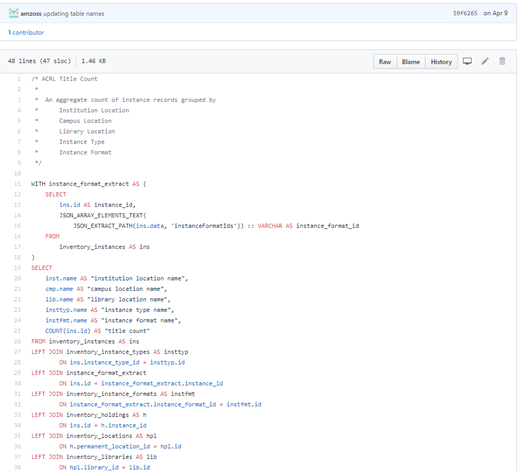
- Use your mouse to select and copy the SQL code to paste into Access
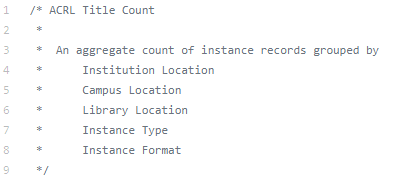
- You may see a section of non-SQL code at the top of the query. This will be comments from the query writer, which can provide useful details to anyone else who wants to use the query.
- If this comment section is separated from the rest of the SQL code using a forward slash “/” and “*” (see example below), you will want to either omit the comment section from the code you copy, or simply place two dashes “--” before each line of the comment section. Otherwise, the query will not run in Access.
Using Access Pass-Through
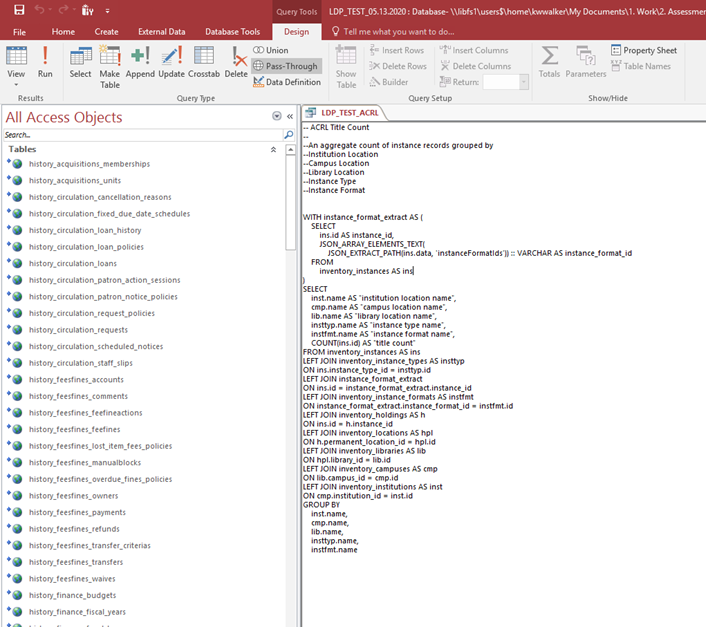
- In the Access top menu, click “create” , then “query design”, close the “show table” window that pops up, and then click the “pass-through” button in the top menu (you are now in the query “design” menu)
- Once you have clicked the “pass-through” button, Access now knows that you will be running a pass-through query. Here you are running SQL code directly on the database server.
- Paste the SQL script you copies from GitHub into the query window
- Click “Run” in the top left corner of your screen
Popup Window:
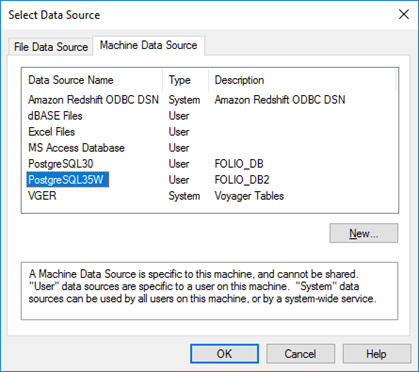
- Once you click “run” to execute the pass-through query, Access will ask you to identify the data source you’re querying.
- Click the “Machine Data Source” tab to access the ODBC data source you set up earlier. Click on that data source and then the “OK” button.
Next Screen:
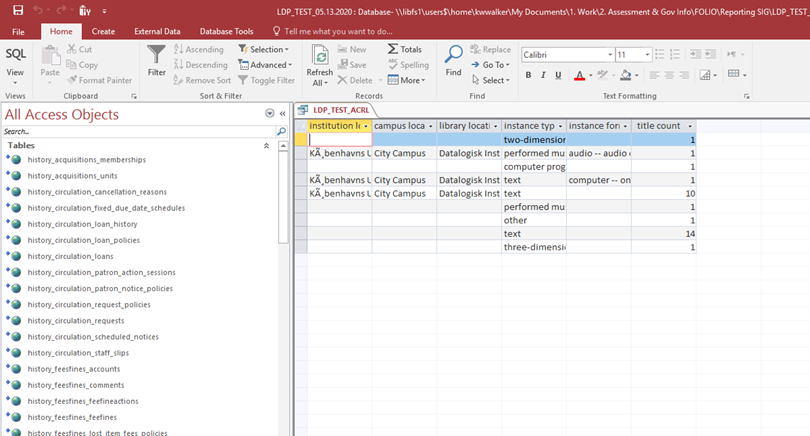
- Your query will run and the results should display in the query window
