The dashboard is designed to enable a personalised view of key information from across Folio apps at a glance. In its first release (included in the Juniper flower release) the dashboard includes the ability to display information from the Agreements and Licenses applications.
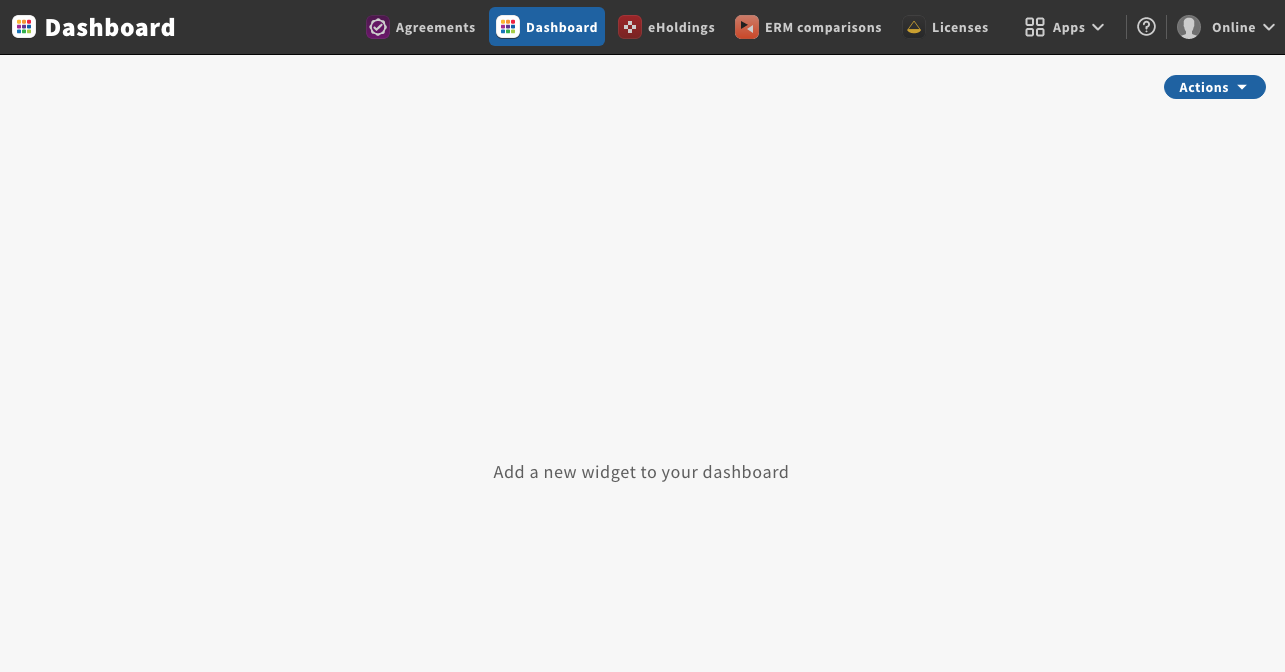
The dashboard application is accessed via the application bar, and on accessing the dashboard application for the first time the user will be presented with a blank dashboard containing the text "Add a new widget to your dashboard" with an "Actions" button displayed at the top right of the screen. To display information on the dashboard, the user will need to add a "widget" (see below) which can be done from the Actions button.
Widgets
To display information on your dashboard, you need to add widgets. Widgets can fetch and display information from Folio applications or other sources. There are different types of widget which are used depending on the type of information you want to display. Widgets are often configurable by the user (e.g. to choose which data displays), and so the same type of widget can be added multiple times but with a different configuration to display a different set of information (see the widget examples for more information).
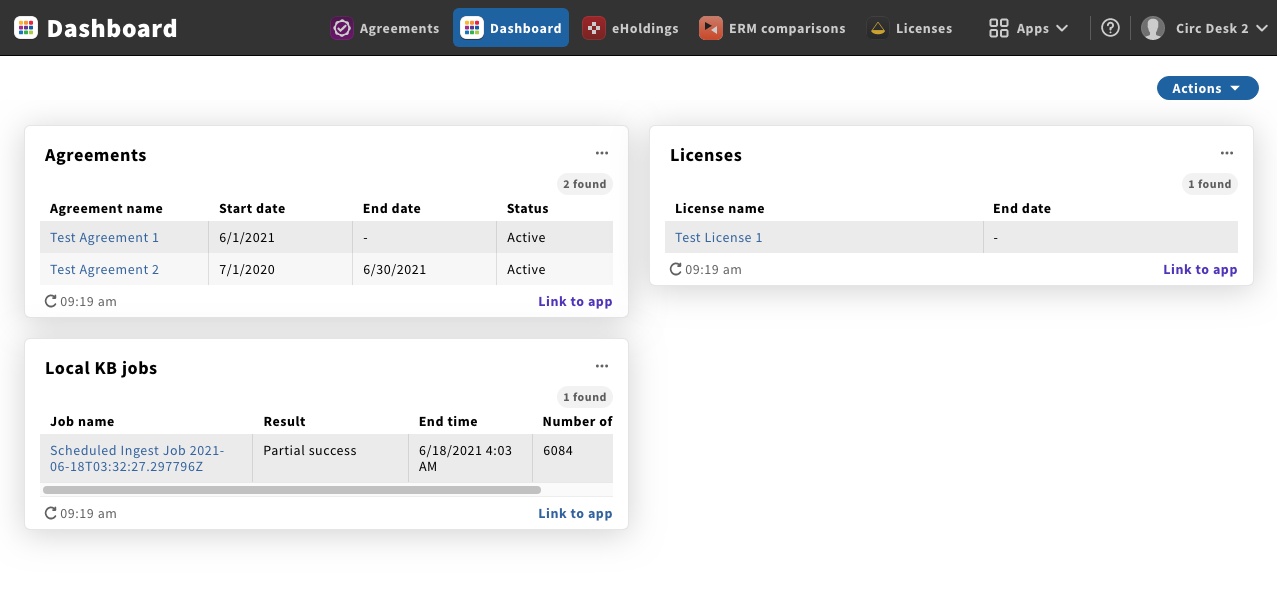
Users can decide which widgets are displayed on their dashboard, and the order in which they display. Each user has their own dashboard, so each user can configure the widgets they need in an appropriate way for their particular needs. Once a dashboard has been populated with widgets it looks like this:
Adding widgets to the dashboard
To add a new widget to the dashboard, click the Actions button on the dashboard and choose "New". The widget configuration screen will open prompting the user to give the widget a name (which will be used when displaying the widget on the dashboard) and to choose the "Widget definition" they want to add. The widget definition determines the type of widget being added to the dashboard, and comes with it's own configuration options. For example, the "ERM Agreements" widget definition will display data from the Agreements application, and allows the user to configure search and filter criteria to decide which agreements are displayed, as well as allowing the user to configure what which agreement properties are shown in the widget on the dashboard.
Normally the widget definitions are created by the applications that support the dashboard, so which widget definitions are available will depend on the applications you have installed in your Folio tenant. In the Juniper release the Agreements app comes with two dashboard widgets ("ERM Agreements" and "ERM Agreement Jobs") and the Licenses app comes with one dashboard widget ("ERM Licenses").
Reordering widgets
Once you have multiple widgets on the dashboard, you can control the order in which they display by clicking the dashboard Actions button and selecting "Edit widget display order". On selecting this the user will be shown a list of all the widgets on their dashboard with the option of dragging and dropping them into the desired order. Widgets are displayed across the dashboard first (left-to-right or right-to-left depending on the Folio locale) and then down - although the number widgets that can fit in a row will depend on the browser size and screen resolution. A minimum of one and a maximum of four widgets will display on one row.
Editing widgets
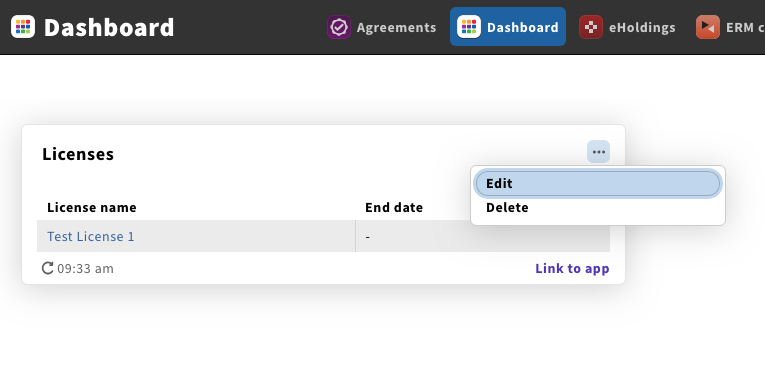
Existing widgets can be edited to change their configuration. To edit an existing widget click the three dots at the top right of the widget and choose "Edit" from the menu that displays.
The "Widget definition" cannot be changed when editing an existing widget (i.e. you can't change an ERM Agreements widget into an ERM Licenses widget), but all other aspects of the configuration, including the widget name, can be edited
Deleting widgets
To delete a widget, click the three dots at the top right of the widget and choose "Delete" from the menu that displays. You will be asked to confirm you wish to delete the widget
Choose "Delete" to confirm, and the widget will be deleted. Deleting a widget is only deleting the particular widget configuration used for this widget and does not affect any other data in Folio. Once a widget has been deleted it cannot be recovered, and you would have to add a new widget and recreate the previous configuration to be able to get an identical widget back on your dashboard.


